Grounding an outdoor radio antenna is mostly about giving lightning and static a safe path to earth instead of through your radio. You drive an approved ground rod, bond the mast and coax shield to it with solid copper, and tie that rod to the house service ground. Most of it is a careful half-afternoon job with basic tools, and a single overhead power line can turn it into a job for someone else.
The thing worth knowing before you buy anything: not every outdoor antenna needs its own rod. A small receive-only whip on a balcony often does not, while a rooftop mast, a CB whip, a ham beam or a cellular booster almost always does. The manufacturer’s installation manual decides that, and the plan below follows it. If your manual says nothing about grounding, ask before you install, because a guess here can be the expensive kind.
Table of Contents
- What You Need
- Step-by-Step: How to Ground an Outdoor Radio Antenna Safely
- Common Mistakes
- Frequently Asked Questions
- Does every outdoor radio antenna need a grounding wire?
- What is the difference between antenna grounding and lightning protection?
- Should a radio antenna ground connect to a metal mast?
- Will grounding an outdoor antenna improve FM reception?
- Do I need a professional to ground an outdoor radio antenna?
- Can I ground an outdoor radio antenna to a water pipe?
- Conclusion: Make the First Safety Check
What You Need
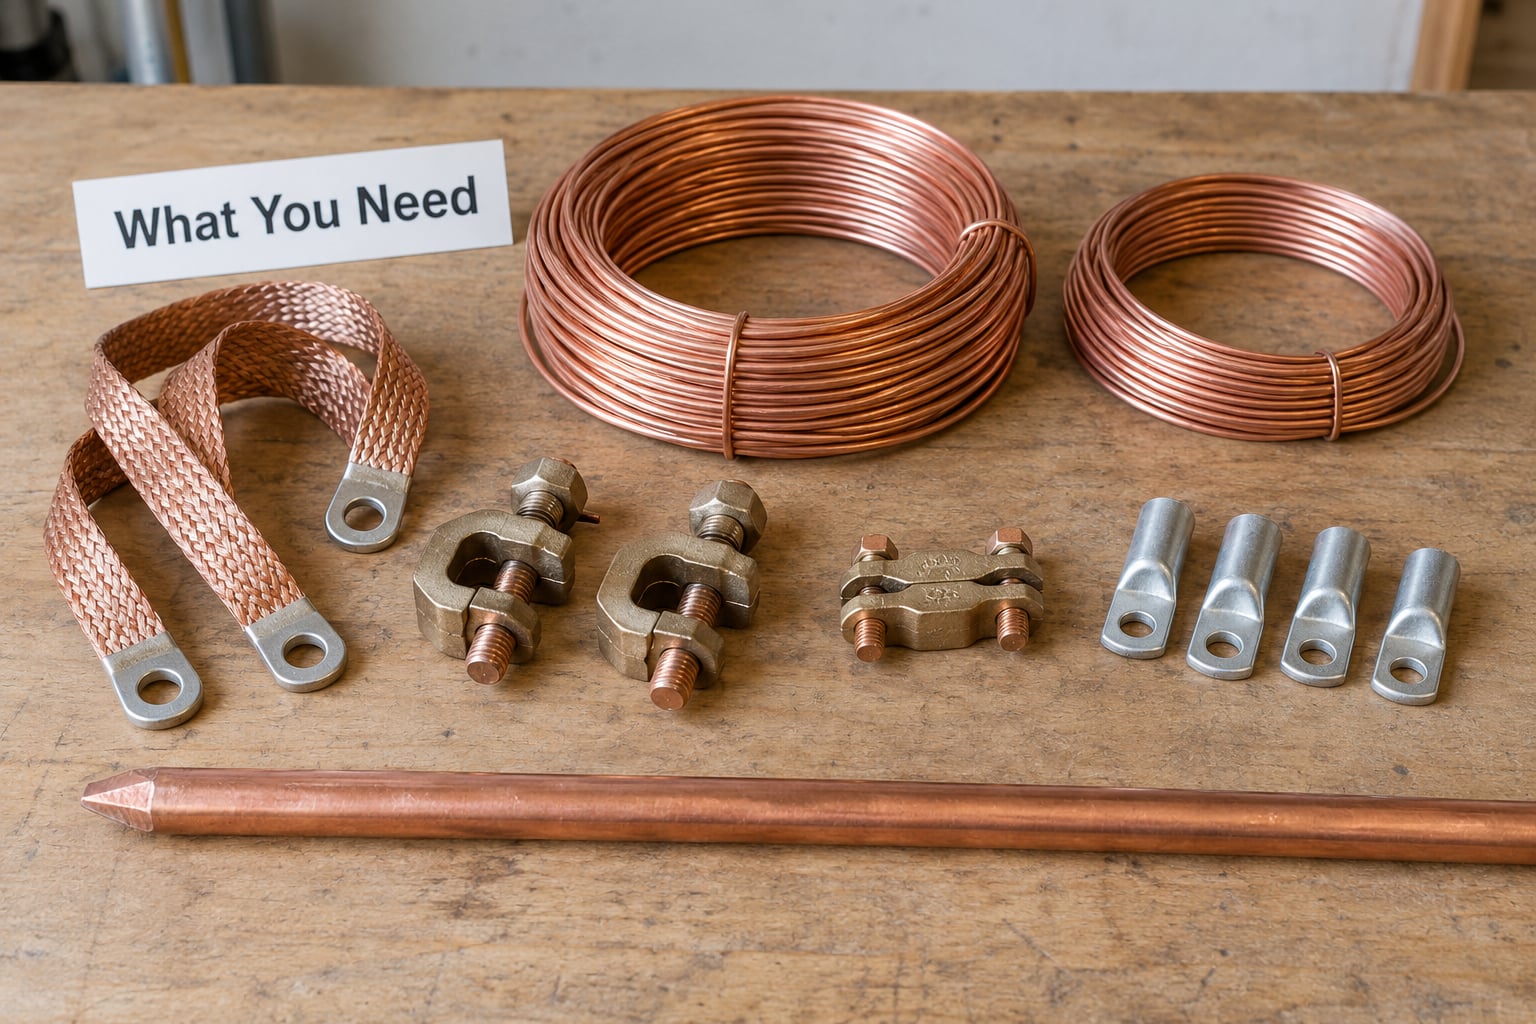
The first thing to sort out is whether your antenna is being grounded at all. Check the model number on the antenna or the receiver, find the installation manual, and look for a grounding section. A TV antenna manual usually spells out a mast-to-coax bonding jumper. A receive-only whip in a first-floor window may say nothing about grounding, and a mast climbing above the roofline on a tower will almost always have a required electrode.
When a ground is called for, the manual or your local electrical code will point at these parts:
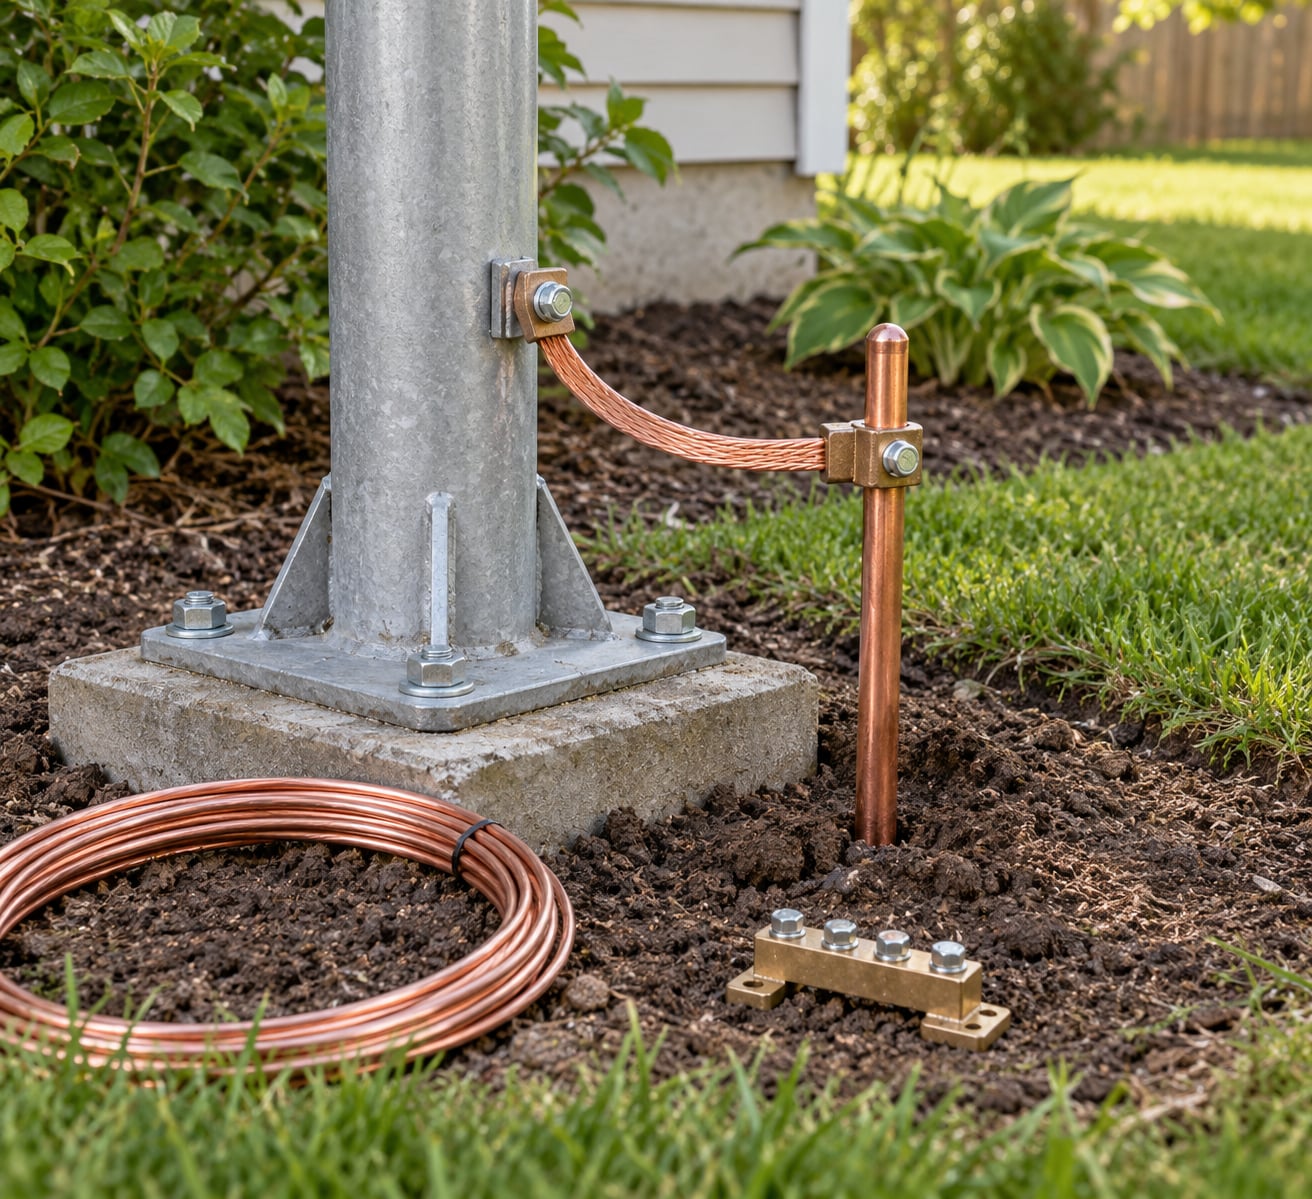
- The conductor. Solid bare copper, typically #6 AWG for the mast and coax bonding jumper, run as short and straight as the site allows. Check the manual and the code table before you buy, because gauge requirements change with run length and with how the conductor is routed.
- An approved ground electrode. In most cases a copper-clad steel or copper rod that stays in contact with the soil continuously over its bonded length. Codes commonly call for about 8 feet, with more required where the soil runs into rock, so check yours before driving.
- Bonding hardware. Listed clamps or lugs for the rod, the mast and the coax, and a grounding block for the coax shield. All of it needs to be listed for the purpose and sized for the conductor.
- Connectors and sealant. Weatherproof connectors for the coax, plus a non-hardening sealing compound or self-amalgamating tape over outdoor joints. Coastal installs also justify stainless hardware and an anti-oxidant on dissimilar metals.
- Tools. A sledge or a ground rod driver, a digging bar, a socket set for the clamps, and a multimeter for the continuity check later.
- Safety kit. Gloves, eye protection, a hard hat if you are near a roof edge, and a clear picture of the overhead lines before you carry anything long near the roof.
One clarification before the list becomes expensive: a lightning arrester and a surge protector are two different parts on two different ends of the run. The arrester belongs at the antenna where the coax leaves the mast. The protector belongs at the entry panel where the coax comes into the house. Grounding the mast does not replace either one.
Step-by-Step: How to Ground an Outdoor Radio Antenna Safely
1. Confirm Whether Your Antenna Requires Grounding
Find the antenna and receiver model, then read the installation instructions and any local electrical requirement that applies to your site. You are checking two separate things, and people mix them up constantly. Signal grounding is about noise and common-mode currents. Lightning protection is about surge energy. Your manual will usually call for both, but the grounds that matter for safety are the bonding path and the electrode.
Success check: you can point at the page or page number that says what has to be bonded, to what, and with what conductor. If you cannot, that is the moment to call the manufacturer or a qualified installer, not the moment to improvise.
2. Plan a Safe Route to the Grounding Electrode
Choosing where the electrode goes decides whether the rest of the job is easy. You want an approved grounding point that satisfies the manual and the applicable code, a short and direct conductor path, and a spot clear of buried services. Call before you dig, and keep well away from any gas line, water line, cable run and driveway edge. Avoid the drip line under the eave, because a bond that stays wet all winter corrodes faster than anything else on the mast.
Do not let the plan run a bonding conductor near or parallel to overhead power wiring. If the shortest sensible path forces the conductor to cross under a service drop or share a pole with mains cabling, change the plan or change the electrode location.
Success check: you have a marked spot on paper, a confirmed path for the conductor, and no conflict with anything buried. Measuring the run before you buy the wire keeps the gauge in the right bracket for the code table.
3. Install the Grounding Conductor and Connection
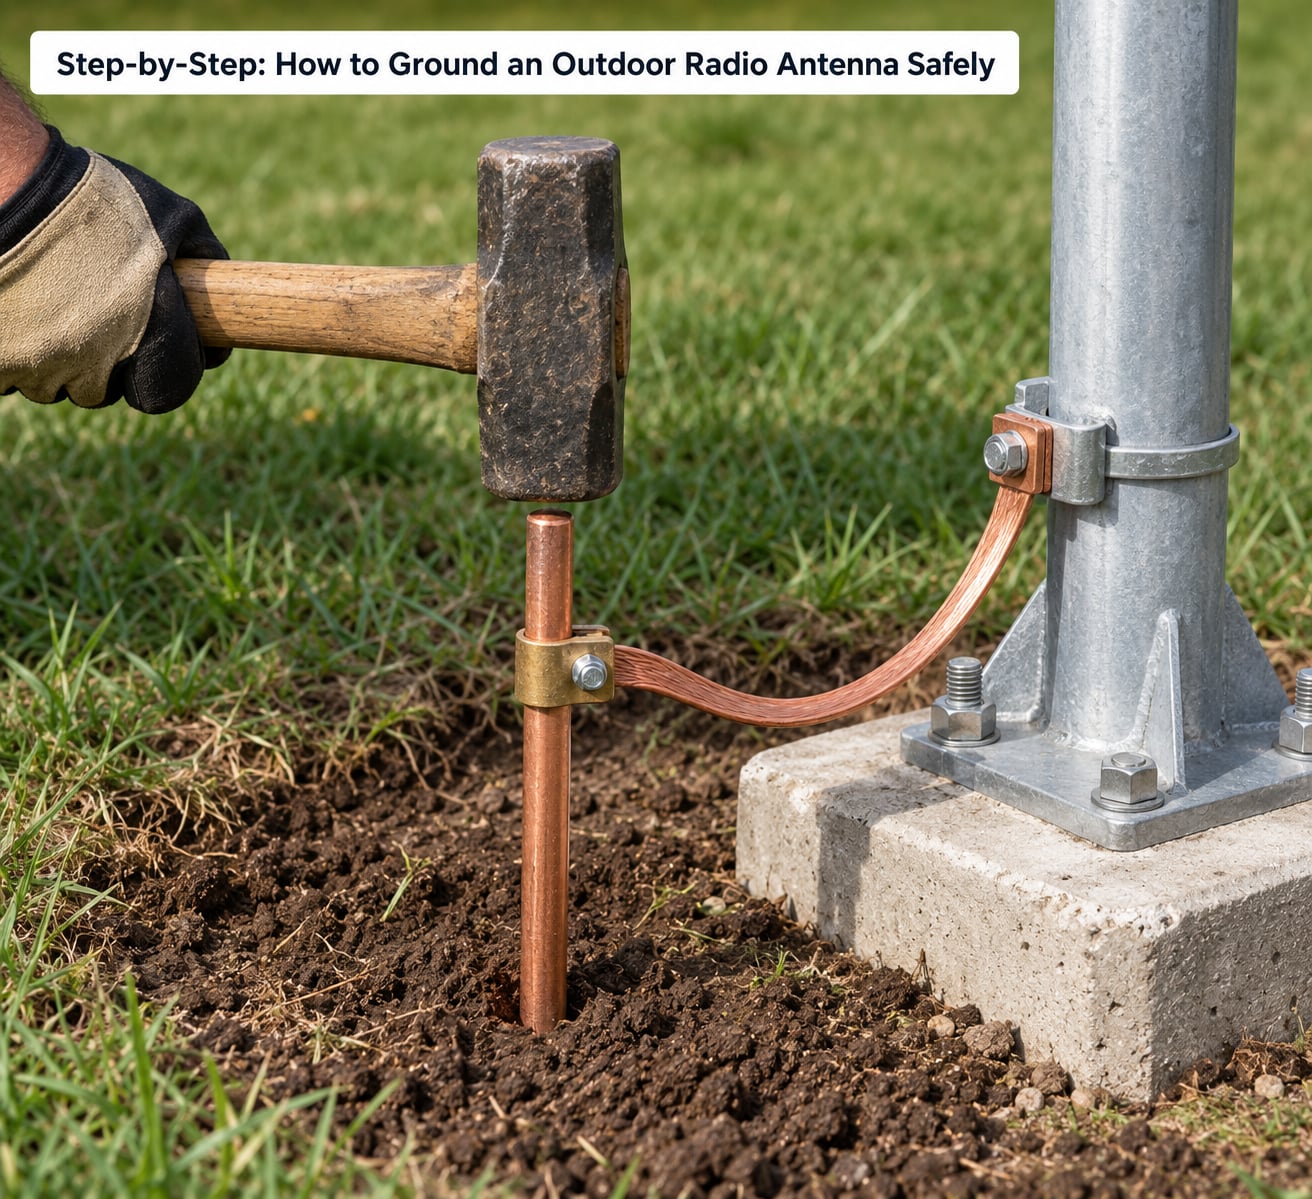
Drive the rod into the marked spot with a sledge or a proper driver, keeping it straight and leaving enough rod standing above grade for the clamp. Then cut the conductor to length and land it in the rod clamp, following the clamp manufacturer’s instructions on how far to tighten. Lay in the short, direct run from the rod to the mast, and bond the coax shield through a grounding block rather than wrapping bare wire around the jacket.
Twisting two bare wires together and wrapping them in tape is not a bonding connection. Neither is a hose clamp biting into galvanised mast pipe with no listed bonding lug behind it. Paint, powder coat and galvanising layers are all insulators as far as current is concerned, so the clamp has to land on bare metal that the manufacturer of the mount intended you to use.
Success check: every joint is a listed mechanical or exothermic connection, the conductor has no nicks or kinks, and the coax shield is terminated at the grounding block, not wrapped and left.
4. Check Connections Before Powering the System
Power stays off while you look. Confirm mechanical strength first: no connector is relying on a single screw, no strap is under tension, and nothing has pulled the coax tight against a bracket. Then check continuity with a multimeter between the mast, the rod and the house service ground, following the manual’s expected readings. If the meter reads open, look for paint, corrosion or a lug that never reached bare metal.
Check weather resistance at every exposed joint, confirm the required bonding hardware is present and correctly oriented, and re-check clearances to power lines one more time from the ground looking up. At the entry point, the coax shield needs its own ground to the house service ground, because the lightning path has to be continuous from the antenna end all the way to the panel.
Success check: a continuous path exists from the mast to the rod to the service ground, every exposed joint is sealed, and the run is nowhere near mains wiring.
5. Test Reception and Monitor the Installation
Restore power, then compare the receiver’s noise floor and signal readings before and after the work. Grounding often changes the noise more than it changes the signal, and on a marginal FM setup a quieter receiver is the tell that common-mode currents are now being handled. On a transmit setup, a healthy ground is what keeps SWR stable, so log your readings once and keep the numbers.
After the first serious wind or rain, go back out and look at the joints. Coastal and exposed sites deserve a seasonal corrosion check, with the cure being clean metal, a proper clamp and anti-oxidant compound, not a thicker wrap of tape. Anything unexpected, a reading that has drifted badly or a hot or loose connection, goes back to the manual or to a qualified installer.
Success check: reception is the same or noticeably quieter, every clamp is still tight and dry inside its seal, and the receiver, not just the mast, looks healthy.
Common Mistakes
Grounding an antenna the manual never asked you to ground. Sometimes a small receive-only antenna works fine unbonded, and adding a random electrode creates a new path for noise and a second ground point that carries current. Confirm the requirement first, then install once.
Bonding to whatever metal is nearby. A fence, a railing, a downpipe, a metal ladder or a nearby water pipe is not an approved electrode. Installations in forums go wrong when someone bonds to a convenient object and the connection is the only thing keeping a surge out of the house.
Undersized or incompatible hardware. Using clamp blocks for the wrong conductor, mixing aluminium with bare copper without a listed connector, or filling a clamp slot with more strands than it is rated for all produce connections that look right and fail under load. Match the hardware to the conductor and the conductor to the code table for your run.
Routing the bonding conductor near power lines. A long straight conductor running alongside mains wiring picks up inductive voltage. Keep clearances as the code and the utility require, and never work on an antenna that is inside the safe approach distance of a service drop without a qualified installer.
Leaving a clamp loose to save a minute. Copper expands and contracts, and a loosened clamp goes green before the first winter is out. Torque it as the clamp maker specifies, mark the nut with paint, and look again in a year.
Working the roof during a storm or in the dark. Grounding an antenna safely means nobody gets hurt doing it. Wet steel, wind and overhead lines are a bad combination, and storm work is how people end up in the emergency room rather than on the mast.
Two habits prevent most of the rest. Bond every part of the metalwork that the manual lists, even the parts that look irrelevant, and photograph the finished connection before it is buried or sealed. Photos turn a future argument with an inspector or an insurer into a two-minute job.
Frequently Asked Questions
Does every outdoor radio antenna need a grounding wire?
No. The requirement depends on the antenna, where it is mounted and what your local code says. A mast above a roofline, a CB whip or a ham beam normally needs a ground electrode and a bonding jumper, while some low receive-only antennas do not specify one at all. The installation manual is the deciding document, and the site electrical code can add requirements on top of it. If the manual is silent, ask the manufacturer before you install rather than guessing.
What is the difference between antenna grounding and lightning protection?
Grounding handles energy that has already arrived: static build-up, a nearby induced surge, and stray common-mode current that adds noise to reception. Lightning protection is designed to intercept and divert a strike or induced surge before it enters the building, which is the job of a lightning arrester at the antenna and a surge protector at the entry panel. A buried rod does neither job on its own, and an arrester does nothing useful unless it is properly bonded.
Should a radio antenna ground connect to a metal mast?
In most designs, yes, because the mast is one of the metallic parts that can pick up induced energy and it is mechanically the strongest point on the structure. Bond the mast to the conductor with a listed clamp that lands on bare metal, not on paint, powder coat or galvanising, and bond the coax shield through a grounding block at the same point. Some manuals specify bonding at the mount instead of the mast itself, so the manual wins over general practice.
Will grounding an outdoor antenna improve FM reception?
Sometimes, and the improvement is usually in noise rather than signal strength. A proper ground gives common-mode currents on the coax shield somewhere to go instead of into the receiver, which can quiet a noisy FM floor and stabilise the stereo threshold. It will not create stations that were never there and it will not fix a badly aimed antenna. If your noise floor drops and weak stations firm up, that is the grounding doing its job.
Do I need a professional to ground an outdoor radio antenna?
If the antenna is low, the electrode site is clear, the run is short and you understand the manual, this is a reasonable weekend project with basic tools. Bring in a qualified installer or licensed electrician when the antenna is on a tower, near overhead power lines, attached to a chimney or roof edge you would rather not stand on, over shared wiring, or when the site involves a rented property. Local inspection rules can also require it.
Can I ground an outdoor radio antenna to a water pipe?
Plumbing can be an approved grounding electrode system in some codes, but relying on an old buried water line for an antenna is a poor choice, and on plastic supply lines it is a genuinely bad one. A dedicated driven rod, bonded back to the service ground, is the standard approach. If a local code allows bonding to the metal water service, treat it as a supplement to a proper electrode and follow the bonding rules, the clamp rating and any requirement to keep the connection within sight of the entry point.
Conclusion: Make the First Safety Check
Start with the manual, confirm whether your antenna wants a ground at all, and decide where the electrode will go before you buy copper. Keep the whole run well away from overhead lines, bond every part of the metalwork the manual lists, and seal what you expose.
If the design is unclear, the site is rocky, the roof is awkward or anything sits near mains wiring, that is exactly when a qualified installer earns their fee. Knowing how to ground an outdoor radio antenna safely means knowing which parts of the job are yours.